What’s an intervalometer I hear you ask? Well, if you want to shoot time-lapse with your Nikon or Canon DSLR, then you need to be able to set your camera to take a photo at set intervals and/or for a set period of time. Depending on your model of Nikon you will have this function already built in but if you are a Canon shooter, at the time of writing, there are no DSLR models with this feature built in. That’s where Intervalometers (or remote timers) come in.
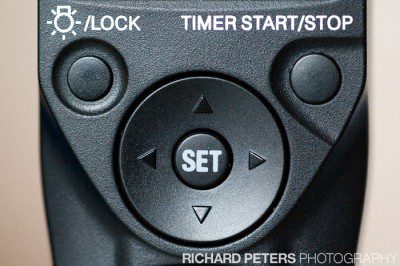
Main controls
I’ve just taken delivery of a copy of the Nikon MC-36 intervalometer. and although this article will review it, the merits of this accessories applies to all photographers looking to do time lapse photography. So please do read on and follow the links below to find yourself either a genuine or copy of the intervalometer you need, be it for Nikon or Canon.
I only recently started getting in to time-lapse photography (you can see my first attempt here) and, luckily, both my Nikon DSLRs have a interval timer shooting mode. This is basically a built in intervalometer and allows me to shoot images on timer at set intervals until a specified number of images is reached. This is great, with the exception that you can only shoot a maximum of 999 shots, and whilst that may sound like a lot of photos, if you are talking time-lapse and assuming you want your final footage to run at 24fps, 999 photos is only going to give you 41 seconds of footage. In many cases that is absolutely fine and more than enough but there will be times that is simply not enough, and for that reason I decided I needed to pick up a remote timer. The only catch…Nikons MC-36 and the Canons TC-80N3 both retail at over £100 in the Uk and over $100 in the States!
You could always tether your DSLR up to a laptop and use software to do time-lapse, however that’s not always practical out in the field, and I’ll save talking about that for another article.
eBay to the rescue
I read up a few reviews on the MC-36 and knew it was what I wanted, but also knew it was a lot of money for what is essentially a piece of plastic with a few buttons and small LCD screen. So, after a friend of mine showed me a copy he had picked up on eBay I decided to pick up a copy myself…and ended up with this, the ‘HAVE MC-36b’…and the price? £20 delivered from Hong Kong! I figured at that price it would be worth taking the chance, and if it was poorly constructed and fell apart, well then that would justify the purchase of the Nikon MC-36. For now though, the MC-36b seems more than up to the task.
First impressions
The first thing that surprised me when I opened the package that fell through my door, was the packaging the actual unit was in. It was all nicely boxed and presented very well. I’ve had several items in the past from Hong Kong and they have usually just been wrapped in bubble wrap and nothing more…so to receive a boxed item complete with instructions was a pleasant change. Plus, it even came with a couple of Duracell batteries…can’t say fairer than that!
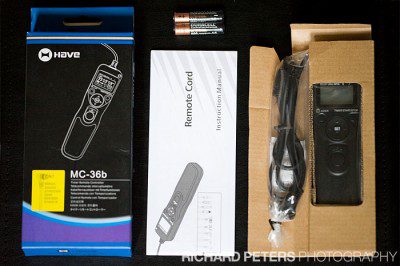
Box, manual, instructions and batteries
Controls
The unit has the standard 10 pin terminal connection so will work with any Nikon DSLR that has that connection. There are four buttons, a 4-way direction pad and light to let you know when it is taking photos. The unit also has an LED screen that lights up green if you need to view in the dark, plus a beeper to let you know it’s taking photos (you can turn this off).
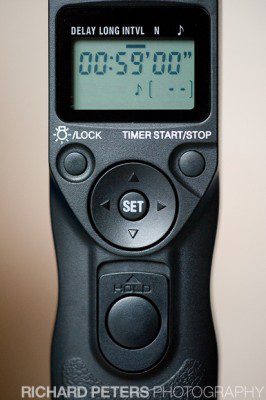
Nikon MC-36 clone, controls
The four buttons are the light/lock button, which toggles the LED screens light on and off, and by holding the button down turns the lock on which prevents any buttons being pressed (this is very helpful when the unit is in your bag as it has no on/off switch, the same as the Nikon MC-36 that is is copying – no idea why you would omit an on/off switch but there you go…).
Next up you have the Timer Start/Stop button – which as you would expect starts the unit going once you have set the timer. Or, you can use the main shutter release button on the unit if you want to take an unlimited number of shots. Just lock it down and let the camera go until you want to stop it. In either case there is a small light on the top of the unit just above the screen, which blinks between green and red as it takes the exposures, so you know it’s working from a distance.
Set button and 4-way pad. You use these to set the shooting delay, duration, number of shots etc.
Timer Settings
This is where the unit really comes in to it’s own, because it allows you to set the camera to go off at a set point (you can choose a delay of up to 99hrs 59 mins 59 seconds) as designated by the word DELAY on the picture below, plus you can also set how long it shoots for if you have a set time duration in mind. Finally, and most importantly for me, you can set the camera to just keep firing between either 1 and 399 shots, or by setting the counter to ‘- -‘ the camera will then fire off forever until you stop it. This will come in handy for Nikon shooters that want more than the 999 shot limit that’s in place with built in interval shooting mode on the D3s etc. The image below shows the remote set up to fire the camera every 59 minutes.
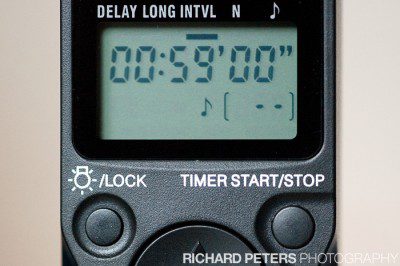
Main LCD
Conclusion and do you need one?
I ave to admit, I have no experience of the official Nikon MC-36 but this copy can’t be far off. It’s quite light weight but very solid with no plastic creaking noises to be heard and the buttons feel nice and robust, and not like they are about to fall out. Time out in the field will tell if this unit really is built to last but for now I’m more than happy with my £20 purchase! The only downside, as I mentioned earlier is there is no on/off switch just like the official Nikon model which also lacks one. Strange but true! Apparently the batteries will last a few months though being on 24/7 but if you were really worried you could always take them out when not in use.
So do you need one of these? Well, the timer function could come in handy for various situations that I can’t even think of, but for me it’s the unlimited shooting mode that is all that matters – a must for anyone wanting to shoot time lapse in my opinion. If you are a NIkon shooter that unlimited shot mode goes one up on the built in 999 shot limit, and if you are a Nikon or Canon shooter that doesn’t have interval shooting built in then one of these intervalometers is essential…and at £20 for this eBay version you’d be slightly crazy not to give it a go!
Want to buy an after market one?
Check out eBay, these links will take you to search results that offer both genuine and after market examples. Just remember to scroll down to the ‘results from international sellers’ to see what’s available to your country…I got mine from a seller called Roxsen.
Canon shooters, click here
and
Nikon shooters, click here.
Want to buy a genuine one?
You can buy the Nikon MC-36 in the USA from B&H Photo, here or in the UK from Amazon.co.uk here.
You can buy the Canon TC-80N3 in the USA from B&H Photo, here or in the UK from Amazon.co.uk here.


