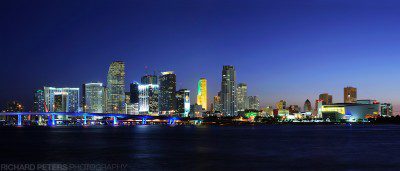
The Miami skyline is truly spectacular and watching it come alive as day turns in to night is certainly an experience…as was shooting from one of the two locations I’m going to talk about here. But it was well worth it to finally get a better version of this beautiful skyline than the grab shot I first took over a year ago. Shown here are some panos from the main two vantage points to take in the full view of this stunning city.

Click for 800 pixels wide
These shots are actually so big I’ve given you a variety of viewing options, you can view the shots at 800 pixels wide, in two chunks at 1200 pixels wide each to see the details better, then finally you can view the full pano at 1800 pixels wide if you have a screen large enough. Ultra wide panos look fantastic printed and framed but are a little harder to convey on a small screen unfortunately so I help the various options provided help you see them a little better. And apologies for the compression in the sky but I was trying to keep file sizes down…also, the white dots are not sensor noise but actually stars.
Details, shot one: from under the Mac Arthur Causeway
Number of shots: 4 horizontal images.
Camera: Nikon D3
Lens: Nikon 28-70
Settings: 10 second exposures at f9
Accessories: Gitzo GT5541 LS tripod, Nikon MC-30 release cable, Really Right Stuff BH-55 ball head
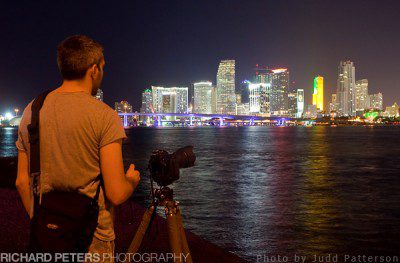
Photographing the skyline
The famous Mac Arthur Causeway view
My first experience of shooting from this area was over a year ago. It’s down along the shoreline near the Mac Arthur Causeway and the first time I saw this location was at 1130pm when there wasn’t many people around…except for a few lurking in the shadows and a gang of quite noisy guys down the path hanging out under the causeway itself around some pretty banged up old cars…oh and there was a thick smell of drugs in the air. It’s a fairly tired looking area in general (apart from the Childrens Museum not far away) and as you can imagine, I didn’t really want to hang about too long with a nice shiny and expensive camera in my hands. Fast forward over a year and I finally got to go back to try and get a better shot. This time however, I was meeting up with local photographer Judd Patterson who assured me ‘it’s a relatively safe location, just with a few characters around at times’…or words to that affect. And given that this time we were shooting at dusk, when there are still people around I felt quite confident that Judd knew his stuff and myself along with my equipment would make it through the shoot at this location just fine.
Click to view at 1200 pixels wide
The rantings of a crazy man
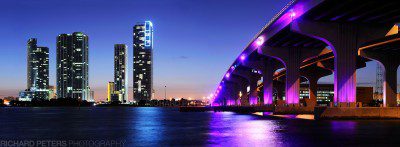
When I first arrived at the site it was still daylight but even so the drive under the causeway to meet up with Judd at first had me wondering if in fact this really was somewhere I wanted to be. My drive of just a few hundred feet included going past a very banged up old van that had some guy sitting inside who at first ducked when he saw me, then proceeded to watch me like a hawk as I drove past…and then I was greeted to the sight of a topless man, with very long matted hair standing at the side of the road waving his arms around and shouting at somebody who wasn’t actually there! Nice…that’ll be the ‘the few characters’ then. I have to admit, if I was going to be there alone I’m not so sure I wouldn’t have just floored it and headed for the safety of the main road! Once I was out the car and setting up, chatting away to Judd my unease started slowly passed and in fact several photographers showed up as well as a couple of people to fish. I wasn’t even that bothered when the man who shouts at thin air came over asking for money…again had I been alone I probably would have just screamed ‘take the camera, take it take it’ and ran for what I would have just assumed was my life.
Click to view at 1200 pixels wide
It all came good in the end
I have to admit, once set up and waiting for the light to turn the stress of worrying about the surroundings was worth the price. I love the Miami skyline and watching the lights come on as the light of day fades around it is incredible. We shot for about 45 minutes from just after sunset until the sky was totally black, with plenty of shots in between with the sky at various stages of illumination. There was a light breeze but despite the weather being cloudy and overcast all day the skies cleared up totally before sunset (a few wispy clouds would have been nice but you can’t win them all).

Click to view at 1800 pixels wide
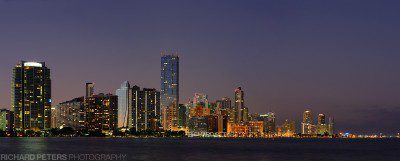
Details, shot two: from Key Biscayne
Number of shots: 4 horizontal images.
Camera: Nikon D3
Lens: Nikon 28-70
Settings: 10 second exposures at f9
Accessories: Gitzo GT5541 LS tripod, Nikon MC-30 release cable,Really Right Stuff BH-55 ball head

Click to view at 800 pixels wide
Key Biscayne, by comparison to Mac Arthur, is a much more relaxing area to shoot from. The trade off, is of course the view which isn’t quite as iconic as you are shooting from the other side of the skyline and away from the sun. The advantage to that is however, that you get the colour of the sky reflecting off the sides of the buildings which can give some lovely colours and tones to your image. So the view is not exactly shabby! The road runs right along the water front through Key Biscayne although getting a clear view can be tricky as there are lots of trees and other obstacles along the side of the road. However quite near the entrance to the Key, not too far past the toll booths there is an area to park up under a tree line (which you can see on Google maps here) . From there you can get a clear view across the water until well after dark…
Click to view at 1200 pixels wide

Click to view at 1800 pixels wide
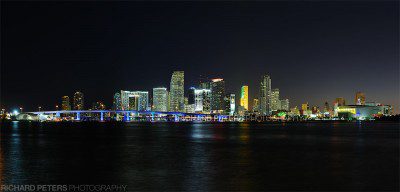
Details, shot three: from under the Mac Arthur Causeway
Number of shots: 8 vertical images.
Camera: Nikon D3
Lens: Nikon 70-200 VR
Settings: 10 second exposures at f9
Accessories: Gitzo GT5541 LS tripod, Nikon MC-30 release cable,Really Right Stuff BH-55 ball head
This shot is the same as the first but taken a few minutes later when the sky was much darker.

Miami Skyline, click for 800 pixels wide
Click for 1200 pixels wide
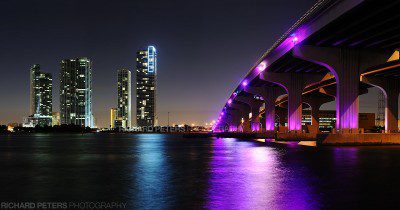
Click for 1200 pixels wide

Click to view at 1800 pixels wide


